Do It Yourself Pool Enclosure Kits: A Comprehensive Guide
Published on: February 25, 2026 | Last Updated: November 17, 2025
Written By: Lila Fairholme
Do yourself pool enclosure kits are pre-designed packages containing all materials, hardware, and step-by-step instructions to build a protective structure around your swimming pool. Unlike custom-built enclosures, these kits use modular components designed for self-installation, with options ranging from basic screen domes to retractable glass-panel systems. This guide compares top-rated kits like Screen Tight’s aluminum-frame models and EZ Snap’s polycarbonate designs, breaks down costs (typically $8-$25 per square foot), and lists trusted suppliers such as Pool Enclosures Inc. and DIY Pool Covers Direct.
You’ll learn how to choose a kit that fits your pool’s shape—rectangular, oval, or freeform—and local climate. We analyze popular types: screen enclosures that block debris, retractable canopies for adjustable shade, and rigid-frame systems with tempered glass panels. Detailed charts compare material lifespans (10+ years for powder-coated aluminum vs. 5-8 years for PVC), wind resistance ratings, and maintenance needs like screen patching or track cleaning.
We’ll also walk through installation essentials: preparing a concrete or paver base, assembling trusses, and sealing panels. Safety protocols meet ASTM standards for child-resistant latches and 200+ mph wind certifications. Whether you’re enclosing an inground pool or an above-ground model, this guide helps you balance upfront costs with long-term benefits like reduced chemical use and year-round swimming.
Introduction to DIY Pool Enclosure Kits
Do it yourself pool enclosure kits offer a practical solution for homeowners aiming to protect their pools year-round without relying on professional contractors. These kits have surged in popularity as more pool owners prioritize cost efficiency, personalization, and long-term maintenance control. Designed for those comfortable with basic tools and weekend projects, these systems bridge the gap between temporary covers and permanent structures. With the growing interest in DIY projects, automated options for pool covers are now easier to install than ever. A DIY automatic pool cover can provide similar benefits, offering convenience and reducing heat loss for a more efficient outdoor space.
Crucial Winterizing Products
"The all-in-one solution for a guaranteed clear spring opening."
All-in-One Closing Chemical Kit
Winter demand is high - check stock

"The 'set & forget' option. This is the easiest winterizing I've ever done."
Simple 3-in-1 Winterizing Balls
Winter demand is high - check stock
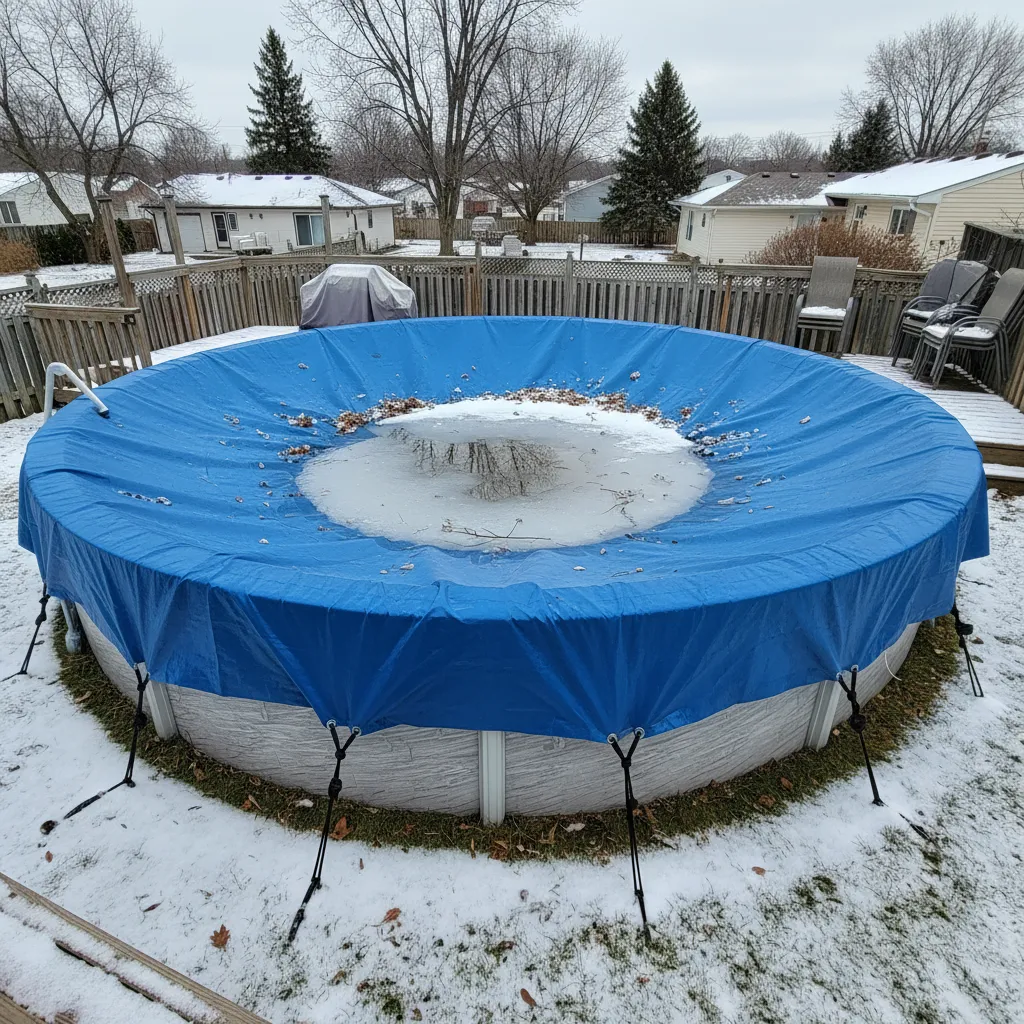
"Invest once to protect your liner and prevent a swamp in the spring."
Heavy-Duty Winter Pool Cover
Winter demand is high - check stock
A typical DIY pool enclosure kit includes pre-cut aluminum or galvanized steel frames, fasteners, UV-resistant screens or panels, and step-by-step assembly guides. Materials like powder-coated aluminum (metal treated with a dry finish to resist corrosion) and tempered glass panels cater to varying climates, from humid coastal areas to regions with heavy snowfall. Modern kits often incorporate modular designs, allowing adjustments for irregular pool shapes like kidney, oval, or rectangular layouts.
The appeal lies in balancing affordability with functionality. While professional installations can exceed $20,000, a DIY pool enclosure kit averages between $5,000 and $15,000, depending on size and materials. Retractable canopy options add versatility, letting you open the pool to sunlight or seal it during storms. Screen-based models excel at keeping debris and insects out, while glass systems maintain visibility and heat retention.
Beyond cost, these kits empower owners to tailor enclosures to their needs. Want a 10-foot clearance for palm trees? Need a reinforced frame for hanging patio lights? Customization extends to color choices, door placements, and ventilation options. Local building codes and HOA guidelines still apply, but manufacturers often pre-engineer kits to meet common regional standards, simplifying compliance.
Ready to explore what makes these kits tick? Let’s break down their components, designs, and the tools required to transform your backyard oasis.
What Are DIY Pool Enclosure Kits?
Do it yourself pool enclosure kits offer homeowners a way to build protective structures around their pools without relying on contractors. These kits provide all materials needed to create barriers that shield water from debris, reduce evaporation, and improve safety. As you consider pool maintenance, it’s also important to think about how to convert your pool to saltwater. Converting to a saltwater system can be beneficial for both water quality and maintenance.
Definition and Purpose
A DIY pool enclosure is a prefabricated structure designed for self-installation. Made from aluminum frames, polycarbonate panels (durable plastic sheets), or mesh screens, these kits serve multiple roles. They block leaves and insects, retain heat, and limit UV exposure. Some models meet safety standards to prevent accidental pool access, especially for households with children or pets.
Common Components Included in Kits
Most do it yourself swimming pool enclosure kits contain modular parts for streamlined assembly. Aluminum beams with powder-coated finishes resist rust and come pre-cut for specific designs. Polycarbonate panels or UV-resistant screens attach to frames using tension clamps or rubber spline channels. Bases often include concrete anchors or ground stakes for stability. Advanced kits feature retractable roof sections, sliding doors, or adjustable ventilation panels. Hardware like screws, brackets, and weatherproof seals ensure long-term durability against wind loads up to 90 mph in certain models.
Benefits Of Building Your Own Pool Enclosure
Opting for a pool enclosure diy project creates opportunities to tailor the structure to your needs while keeping expenses manageable. Let’s break down the advantages.
Cost Savings
Professional installations range from $15,000 to $40,000, but pool enclosure kits diy reduce costs by 35–60%. A basic screen enclosure kit starts at $5,000 for a 12’x24’ pool, while premium glass-panel systems average $12,000. Labor fees account for 40–50% of total costs in contractor-led projects, making self-installation a budget-friendly choice. Kits also eliminate design fees, as most manufacturers provide free customization tools on their websites. Considering the options available, it’s important to look at regional pricing for pools as it can vary. For instance, Highland Park pool costs can provide different budget considerations for homeowners looking to invest in their backyards.
Customization Flexibility
Build your own pool enclosure to match your backyard’s layout and style. Choose between clear vinyl windows, tinted polycarbonate roofs, or solar screens that block 90% of UV rays. Adjust heights for overhead clearance—options range from 8’ low-profile domes to 12’ gabled designs. Retractable canopies let you open sections for stargazing, while fixed frames support climbing plants for a natural aesthetic. Some kits allow adding side awnings or integrated storage compartments post-installation. A well-designed enclosure enhances the overall experience of your backyard. Incorporating a pool can create a perfect oasis for relaxation and entertainment.
Enhanced Pool Safety and Cleanliness
Enclosures with self-latching gates or childproof locks align with the Virginia Graeme Baker Pool & Spa Safety Act guidelines, deterring unsupervised access. Mesh screens with 18×16 weave density stop pollen and sand, cutting filter cleaning cycles by 30–50%. Tempered glass or reinforced panels withstand hail impacts, reducing the risk of shattering. Enclosed pools also require 50% fewer chemicals due to limited sunlight exposure and organic contamination.
With these benefits in mind, exploring the types of DIY enclosures available helps match features to your priorities.
Also See: Can You Leave My Pool Pump on 24/7? Key Points
Types Of DIY Swimming Pool Enclosure Kits
Selecting the right style for your pool enclosure impacts aesthetics, function, and long-term performance. Explore four popular designs suited for different climates, budgets, and maintenance preferences. When considering options for creating a stunning outdoor space, think about how shipping container pools can fit into your overall plan. Shipping container pools offer unique designs and can be customized to suit your style.
Screen-based Enclosures
Screen-based kits use tightly woven polyester or fiberglass mesh stretched across aluminum frames. These systems block 80-90% of UV rays while allowing airflow, making them ideal for humid regions. Screens deter leaves, insects, and debris, reducing weekly skimming by up to 60%. Kits often include reinforced corners and rust-resistant fasteners for longevity.
Retractable Canopies
Retractable canopies feature motorized or manual fabric roofs that slide along tracks. High-density polyethylene (HDPE) or PVC materials provide shade and light rain protection. These kits work well for pools needing intermittent coverage—like solar heating control—with adjustable settings. Expect to spend $6-$12 per square foot, depending on automation features.
Fixed Aluminum Frame Kits
Fixed aluminum frames create permanent structures with powder-coated beams rated for winds up to 110 mph. Panels attach via interlocking rails, supporting materials like polycarbonate or acrylic sheets. These kits suit colder climates where year-round use is desired. Standard gauges range from 1.25” to 2” thick, balancing strength and weight.
Glass Panel Systems
Tempered glass panels (6mm-10mm thick) offer unobstructed views and superior weather resistance. DIY-friendly versions use pre-drilled brackets and silicone seals for watertight joints. While pricier ($20-$40 per sq ft), glass maintains clarity longer than plastics and resists scratches from pool chemicals.

Key Factors to Consider Before Purchasing a Kit
Matching a kit to your specific needs prevents costly mistakes. Prioritize these elements during selection.
Pool Size and Shape Compatibility
Measure your pool’s exact dimensions, including curves or irregular edges. Rectangular kits cost 15-20% less than custom-shaped designs. Verify maximum span lengths—most aluminum frames cap at 16’ without extra supports. Keeping these factors in mind can help you find the cheapest inground pool option. Choosing a standard shape can further reduce your overall cost.
Material Durability and Maintenance
Marine-grade aluminum withstands saltwater corrosion better than standard alloys. Polycarbonate panels require UV-resistant coatings to prevent yellowing. Screens need annual patching; budget $100-$300 for replacement rolls every 5-7 years.
Local Regulations and HOA Requirements
Check setback rules, height limits (often 8’-12’), and wind load codes. Coastal areas may mandate hurricane straps or laminated glass. Submit plans early—permitting can take 4-6 weeks.
Installation Complexity and Time
Basic screen enclosures take 2-3 days for two people. Retractable systems with motors add 8-12 hours for electrical work. Glass panel kits demand precise leveling; rent laser tools if needed.
Budget and Long-term Value
Entry-level screen kits start at $3,000; premium glass reaches $15,000. Compare warranties—leading brands cover frames for 20+ years. Energy savings (reduced heating costs) can offset 30-40% of upfront expenses over a decade.
Step-by-step Guide to Installing a DIY Pool Enclosure
Proper installation ensures structural integrity and safety. Follow these stages methodically.
Pre-installation Planning
Mark utility lines using local “call before you dig” services. Create a staging area for materials 10’ from the pool edge. Review assembly diagrams, noting numbered parts and torque specs for bolts. After everything is set up, consider the importance of your pool light bulb. Choosing the right pool light bulb can enhance visibility and safety around the pool area.
Foundation Preparation
Pour concrete footers 12” deep at post locations, adding rebar for stability. Use a transit level to ensure all footers sit flush. Let cure 72 hours before attaching base plates.
Frame Assembly Techniques
Connect vertical posts to horizontal beams with stainless steel pins. Temporarily brace corners with 2x4s until cross-members are secured. Check diagonals with a tape measure—differences over 1” require adjustments.
Attaching Screens or Panels
Stretch screens using a spline roller, starting at the center. For glass, apply butyl tape to framing channels before sliding panels into place. Secure with rubber gaskets to allow thermal expansion.
Final Adjustments and Safety Checks
Test retractable canopies at least five times. Apply silicone lubricant to tracks. Inspect all fasteners with a torque wrench set to 25-30 ft-lbs. Scan for sharp edges using a cloth—snags indicate needed filing.
With your enclosure installed, evaluating its performance against seasonal elements will help maximize lifespan. Next, let’s examine how DIY kits compare to hiring professionals.
Pros and Cons Of DIY Pool Enclosure Kits
Weighing the upsides and downsides of diy pool enclosure kits helps determine if they align with your skills, budget, and goals. Let’s break down key factors. As the weather warms up, many look forward to opening their pools. Ensuring your pool area is ready can enhance your summer enjoyment.
Advantages Of Self-installation
Do it yourself pool enclosures cut labor costs by 40-60% compared to hiring contractors. Kits priced between $5,000-$12,000 typically include pre-drilled extruded aluminum frames, UV-resistant PVC mesh screens, and stainless-steel fasteners. Customization shines here—adjust panel heights, choose tinted polycarbonate roofs, or add sliding screen doors without upcharges. Self-installers also control timelines, completing projects in 10-20 days versus waiting months for pros. Keeping your pool stable is important for maintenance. Using a stabilizer in a 10,000-gallon pool can help maintain water chemistry and clarity.
Potential Challenges and Limitations
Complex designs like curved glass walls or retractable roofs demand advanced tools (e.g., torque wrenches, laser levels) missing from basic kits. Building permits often require wind-load ratings exceeding 120 mph, which budget-friendly screen enclosures rarely meet. Errors in anchoring concrete footings or aligning trusses can weaken structures, risking collapse under heavy snow loads above 25 PSF. Post-purchase support varies: brands like Screen Tight offer lifetime warranties, while generic Amazon listings lack technical guidance.
Maintenance Tips for Long-lasting Pool Enclosures
Protecting your pool enclosure diy investment requires routine care. Follow these strategies to prevent wear.
Cleaning and Repairing Screens
Spray screens monthly with a garden hose, using soft brushes for stubborn dirt. Patch small tears under 3 inches with clear silicone sealant or fiberglass repair tape. Replace entire panels if rips exceed 6 inches—measure frame channels (common sizes: 3/8” or 1/2”) before ordering replacements. For glass systems, apply rain-repellent coatings like Aquapel annually to reduce mineral stains.
Inspecting Structural Integrity
Check frame joints for corrosion every 90 days, especially near saltwater pools. Tighten loose bolts to 10-15 ft-lbs using a torque wrench. Look for bent aluminum rails or cracked welds—these compromise wind resistance. Reinforce wobbly sections with galvanized steel braces ($12-$25 each) anchored to concrete slabs. Keeping your pool equipment in good shape is important for maintenance. Using chemicals like hydrogen peroxide can help lower the amount of chlorine needed for effective sanitation.
Seasonal Maintenance Checklist
- Spring: Clear debris from gutters, lubricate roller tracks with silicone spray
- Summer: Test screen tension, trim overhanging tree branches
- Fall: Install wind straps in hurricane zones, check drainage slopes
- Winter: Remove snow loads above 6 inches, inspect heating cables on motorized roofs

Alternatives to DIY Pool Enclosure Kits
Not sold on self-installation? Explore these options for enclosing your do it yourself pool.
Professional Installation Services
Contractors handle permits, terrain leveling, and complex builds like cantilevered designs. Expect quotes from $15,000-$30,000 for permanent structures with tempered glass walls or automated vents. Brands like Alumawood provide turnkey solutions with 10-year workmanship guarantees.
Pre-fabricated Modular Systems
Companies such as VersaTube sell bolt-together kits with powder-coated steel frames and snap-in screens. These require minimal tools but limit design flexibility—most suit rectangular pools under 400 sq ft. Prices range from $8,000-$14,000, including delivery. If you’re considering upgrading your pool setup, it’s also important to think about the filtration system. Replacing a sand pool filter can greatly improve water quality and clarity.
Temporary Pool Covers and Fencing
Motorized safety covers ($2,500-$6,000) or removable mesh fences ($15-$22 per linear foot) offer short-term fixes. While cheaper upfront, they lack year-round pest control or climate regulation features found in full enclosures.
Still weighing your options? Let’s tackle common questions about pool enclosure kits diy next.
Frequently Asked Questions (FAQs)
How Do DIY Pool Enclosures Perform in Extreme Weather Conditions?
Most quality kits are engineered to withstand wind speeds up to 90–120 mph and snow loads of 20–35 PSF, depending on materials. Aluminum-frame systems with reinforced trusses excel in hurricane-prone areas, while tempered glass panels resist hail damage. Always check the manufacturer’s wind and snow ratings specific to your region before purchasing.
Can I Retrofit Lighting or Heating Systems Into My DIY Enclosure Later?
Yes! Many kits support post-installation upgrades. Aluminum frames can accommodate LED strip lighting with waterproof connectors, and polycarbonate roofs often include pre-marked drill points for solar heaters. Retractable models may require additional crossbars for mounting accessories—consult the manufacturer’s guidelines for weight limits.
What Tools Are Essential for Assembling a DIY Pool Enclosure Kit?
Basic kits require a cordless drill, rubber mallet, level, and step ladder. For advanced installations, rent a laser level for precise alignment and a torque wrench (25–30 ft-lbs) to secure structural bolts. Glass panel systems may need a silicone caulk gun for sealing joints.
Do DIY Pool Enclosures Increase Property Value?
Studies show enclosed pools can boost home value by 5–8%, particularly in regions with long swimming seasons. Buyers appreciate reduced maintenance and year-round usability. Retractable glass enclosures often yield the highest ROI due to their aesthetic appeal and functionality. Another feature that can add charm to outdoor spaces is a specially designed ducks pool. Ducks pools can attract birds and add tranquility to your backyard.
Closing Thoughts
DIY pool enclosure kits offer a practical way to enhance your pool area with cost savings and customization. Whether you choose screen-based designs, retractable canopies, or aluminum frames, these kits provide safety, cleanliness, and extended swimming seasons.
Before purchasing, assess your pool’s size, local regulations, and installation complexity. Proper planning and maintenance ensure your enclosure lasts for years.
For more pool care tips and tools, explore My Pool Calculator. Our resources help you make informed decisions for your backyard oasis.
Additional Resources for You:
- PoolPro Magazine (Industry News & Technical Articles)
- How to DIY a Pool Enclosure: Everything You Need to Know | Angi
- Screen Enclosures Kits 16′ x 20′ – Aluminum carports | Aluminum porch Miami | Insulated Aluminum Patio Covers
- 5 Simple Steps in Assembling a DIY Pool Enclosure Kit
- DIY Pool Enclosures Flat Clear