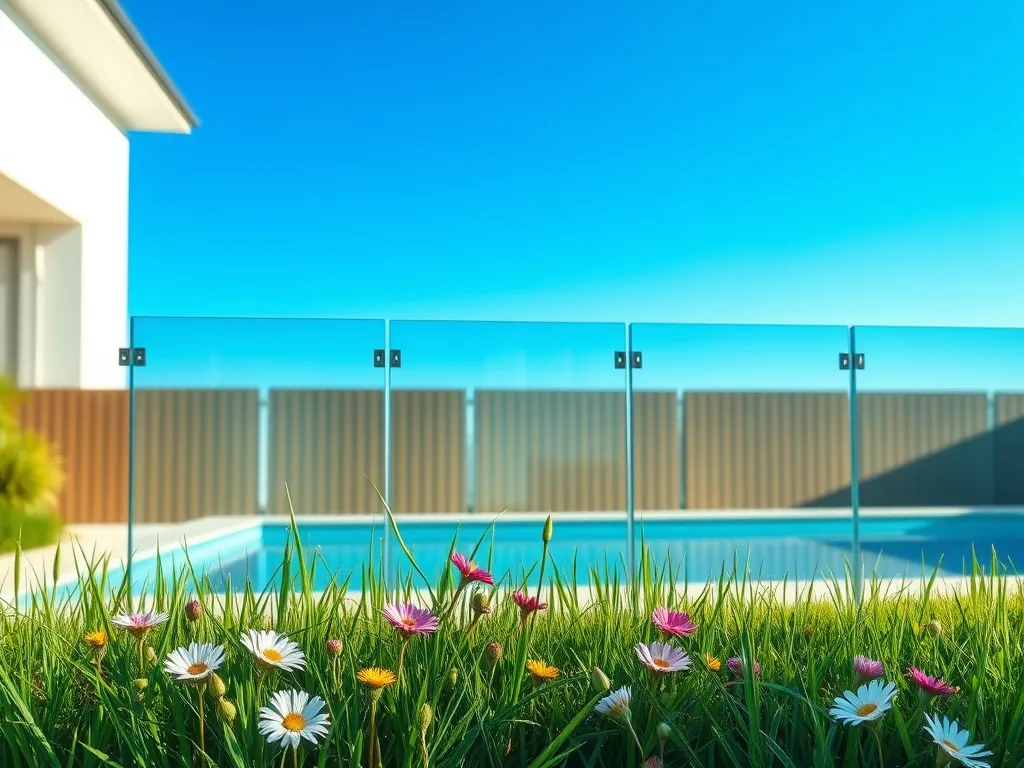
Can You Install Your Own Glass Pool Fencing?
Published on: January 20, 2026 | Last Updated: November 17, 2025
Written By: Lila Fairholme
Yes, you can install your own glass pool fencing if you have basic construction skills, proper tools like a rotary hammer drill and laser level, and follow local safety codes. DIY installation uses pre-assembled panels with stainless steel spigots (metal brackets) anchored into concrete footings, saving up to 50% compared to professional costs averaging $300–$600 per linear foot. Success requires precise measurements, tempered safety glass meeting ASTM standards, and adherence to spacing rules (max 4″ between panels and 2″ above ground).
This guide breaks down every step for homeowners considering a DIY approach. We’ll start by explaining legal requirements, like securing permits and passing post-installation inspections. You’ll find a detailed cost comparison between DIY and pro services, including material prices for 10mm–12mm glass panels ($90–$150 per panel) and hardware kits. We’ll also cover critical safety standards, such as fence height (minimum 48″) and self-closing gate mechanisms.
From foundation preparation to final adjustments, you’ll learn how to avoid common pitfalls like uneven post alignment or insufficient concrete curing time. We’ve included tool checklists, maintenance strategies for water spot prevention, and answers to FAQs about retrofitting fences onto existing decks. Whether you’re a hands-on DIYer or still weighing options, this article provides the clarity needed to make an informed decision.
Legal and Safety Considerations for DIY Installation
While the idea of installing your own glass pool fencing might seem tempting for cost savings, overlooking legal requirements or safety protocols risks fines, structural failures, or even injuries. Let’s break down what you need to know before picking up tools. When considering a few laps pool, safety becomes even more important. Ensuring proper fencing around your pool can help create a secure environment for all swimmers, allowing everyone to enjoy those few laps with peace of mind.
Crucial Winterizing Products

"The all-in-one solution for a guaranteed clear spring opening."
All-in-One Closing Chemical Kit
Winter demand is high - check stock

"The 'set & forget' option. This is the easiest winterizing I've ever done."
Simple 3-in-1 Winterizing Balls
Winter demand is high - check stock
"Invest once to protect your liner and prevent a swamp in the spring."
Heavy-Duty Winter Pool Cover
Winter demand is high - check stock
Understanding Local Building Codes and Permits
Local building codes dictate specific rules for pool fencing, including height, spacing, and materials. For example, the International Swimming Pool and Spa Code (ISPSC) mandates fences be at least 48 inches tall with gaps no larger than 4 inches. Many municipalities require tempered glass panels meeting ASTM C1048 standards (heat-treated for shatter resistance) paired with stainless steel posts. Skipping permits could result in fines up to $2,000 or forced removal of non-compliant fencing. Permit fees typically range from $200 to $800, depending on your location.
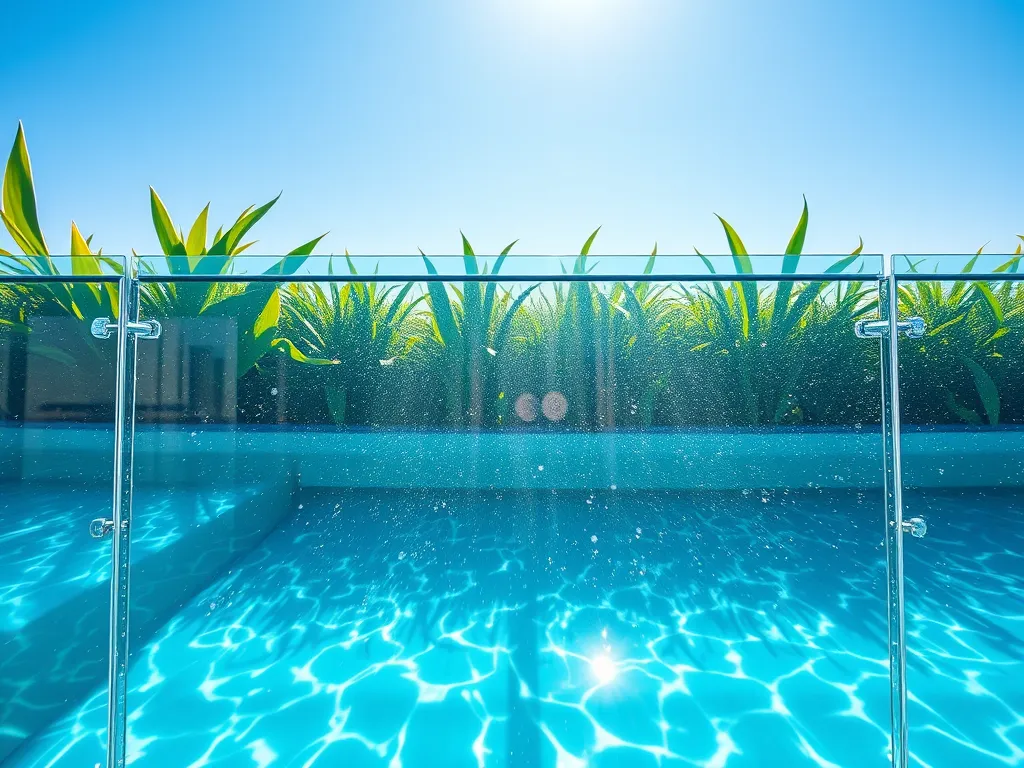
Safety Standards for Glass Pool Fencing
Beyond meeting code minimums, glass pool fencing must prioritize user safety. Tempered glass panels must be ½ inch thick or thicker to withstand impacts up to 400 psi. Edges require polishing or protective silicone caps to prevent cuts. Gates need self-closing hinges with latches positioned at least 54 inches above ground to deter children. The Consumer Product Safety Commission (CPSC) also recommends testing fence stability by applying 50 pounds of force—posts shouldn’t shift more than 1 inch. Neglecting these standards could void warranties or create liability issues.
With legal boxes checked, the next step involves weighing whether DIY glass pool fence installation fits your skill level and budget.
DIY Vs Professional Installation: Pros and Cons
Deciding whether to tackle glass pool fence construction alone requires weighing practical benefits against potential risks. Let’s break down what self-installation entails versus hiring certified glass pool fence installers.
Advantages Of Self-installing Glass Pool Fencing
Opting to install your own glass pool fencing cuts labor costs by 30-50%, with total project spending typically falling between $150-$400 per linear foot. Homeowners gain full control over timelines, letting them work at their pace rather than waiting weeks for contractor availability. Modern prefabricated systems simplify alignment, with pre-drilled posts and tempered glass panels meeting ASTM C1048 safety standards. For those comfortable using laser levels or diamond-tipped drills, the process becomes manageable. Once the pool fencing is in place, it’s important to consider the pool’s water capacity. An oval pool gallon calculator can help you determine how much water your pool needs for optimal enjoyment.
Disadvantages Of Glass Pool Fences
While cost savings appeal, installing glass pool fencing yourself introduces risks. Tempered glass panels weigh 25-35 lbs per square foot, requiring specialized lifting gear to prevent cracks or injuries. Building codes often mandate 48-inch heights, 4-inch post spacing, and non-climbable designs – specifications easily missed without professional training. Structural failures from improper post depth (typically 18-24 inches) or subpar concrete mixtures could lead to collapses during extreme weather.
Cost Comparison: DIY Vs Professional Services
Breaking down the numbers clarifies long-term value:
| Factor | DIY | Professional |
|---|---|---|
| Labor | $0 | $75-$150/hour |
| Materials | $150-$400/lf | $300-$800/lf |
| Warranty | None | 5-10 years |
| Time | 15-30 hours | 8-12 hours |
Hidden expenses like tool rentals ($200-$500) or permit revisions ($100-$300) can erase initial savings for those new to installing glass pool fencing yourself.
Glass Pool Fencing Installation Costs
Material quality and site complexity heavily influence whether you can put glass pool fence in yourself without exceeding budgets. Let’s explore key financial considerations. The choices you make for fencing can affect your overall pool area. When building a pool in your backyard, it’s important to consider all surrounding features.
How Much Does It Cost to Install a Glass Fence Around a Pool?
Frameless systems dominate high-end projects at $450-$800 per linear foot, while semi-frameless designs with aluminum bases run $300-$550. Thicker 12mm glass costs 20% more than standard 10mm panels but resists wind loads up to 130 mph. Regional pricing varies – coastal zones often see rates 15% higher due to corrosion-resistant hardware requirements.
Budgeting for Tools, Materials, and Unexpected Expenses
Beyond glass panels, self-install glass pool fencing demands concrete mix ($6/bag), stainless steel spigots ($65-$120 each), and UV-stable sealants ($18/tube). Specialty tools like rotary hammer drills ($220) or panel suction lifts ($160/day) become necessary. Experts recommend reserving 15-20% of the total budget for surprises like rocky soil requiring post-hole diggers ($90 rental) or tempered glass replacements ($250-$400 per panel). Installing an above ground pool also comes with its own set of costs. It’s important to consider the installation expenses as part of the overall budget when planning for an above ground pool.
With financial factors mapped, the next phase explores physical requirements – from torque wrenches to load-rated brackets – needed to build secure barriers.
Also See: Can a Faulty Valve Cause Pool Pump Priming Issues?
Essential Tools and Materials for DIY Installation
Gathering the right tools and materials forms the backbone of successful self-installed glass pool fencing. Without proper equipment or quality components, even skilled DIYers face setbacks. Let’s break down what you’ll need. As you consider your pool area, it’s important to think about comfort and safety. Creating a sweat pool nearby can enhance your outdoor experience and encourage relaxation.
Must-have Tools for Glass Fence Installation
Specialized tools ensure safe handling of heavy glass panels. Start with a glass suction lifter rated for 100+ pounds to maneuver panels without damage. Diamond-tipped drill bits (10-12mm) create precise holes in glass or metal posts. Use a laser level for alignment, paired with a torque wrench set to 8-10 Nm for tightening stainless steel bolts. Don’t skip safety gear: cut-resistant gloves, impact-rated goggles, and rubber mallet for adjustments.
Selecting Durable Glass Panels and Hardware
Tempered glass panels—12mm thick, meeting ASTM C1048 standards—resist shattering under impact. Laminated options add a protective interlayer. Pair panels with 316-grade stainless steel spigots or base shoes to withstand pool chemicals. Check hardware for IP65 corrosion resistance. Expect to spend $200-$400 per panel, depending on size (common: 48″x60″) and edge polish type (pencil, flat, or beveled).

Step-by-step Guide to Installing Glass Pool Fencing
Proper technique prevents costly errors during installation. Follow these steps to balance safety with structural integrity.
Preparing the Foundation: What’s Required?
Concrete footings anchor posts securely. Dig holes 24-30 inches deep using a 6-inch auger bit, ensuring a 4:1 gravel-to-concrete ratio. Pour fast-setting concrete (3,500 PSI) mixed with acrylic fortifier. Let cure 48 hours before mounting posts. For deck-mounted systems, verify load capacity exceeds 250 lbs per post.
Measuring and Marking Fence Layout
Use a measuring wheel to outline the perimeter, keeping panels 4 inches from the pool’s edge. Mark post locations every 48-60 inches with spray paint. Confirm layout complies with local codes—most require 48-inch minimum height and gates opening outward. Double-check spacing with a 3-4-5 triangle method for right angles. Once the layout is complete, it’s important to ensure that the pool system is functioning properly. A common issue to check for is an air leak in the pool pump.
Installing Posts and Securing Glass Panels
Set posts into footings, using shims to maintain 90-degree alignment. Insert glass panels into U-channel brackets or spigots, leaving 1/4-inch gaps for thermal expansion. Tighten set screws diagonally to distribute pressure evenly. Apply silicone-based sealant around post bases to block water intrusion.
Final Adjustments and Safety Checks
Test gate hinges for smooth operation—self-closing mechanisms must engage within 10 seconds. Inspect glass edges for chips exceeding 1/8 inch, which compromise strength. Run a pool noodle along the fence to detect protruding hardware. Confirm no gaps exceed 4 inches at the bottom.
Maintaining Your DIY Glass Pool Fence
Regular upkeep preserves clarity and function. Neglect leads to foggy panels or loose fittings over time.
Routine Cleaning and Maintenance Tips
Mix 1 cup white vinegar with 1 gallon deionized water for streak-free cleaning. Wipe panels weekly using a microfiber cloth; avoid abrasive pads that scratch surfaces. Lubricate hinges quarterly with PTFE spray. Inspect silicone seals biannually—reapply if cracking appears.
Identifying and Addressing Common Issues
Cloudy glass often stems from hard water deposits. Soak affected areas with citric acid solution (1 tbsp per liter) for 15 minutes before rinsing. Loose posts require retightening with threadlocker to prevent wobbling. For scratches deeper than 0.5mm, consult a glass polishing professional.
Even with meticulous planning, certain oversights can compromise your project. Let’s explore frequent errors DIYers make during glass pool fence construction.
Common Mistakes to Avoid During Installation
Self-installing glass pool fencing offers cost savings but demands precision. Even minor errors can compromise safety, aesthetics, or structural integrity. Let’s break down three critical pitfalls and how to sidestep them. When planning your outdoor space, consider how the fencing complements your overall design. A well-installed inground pool can enhance your home and create a perfect summer retreat.
Incorrect Post Depth and Alignment
Posts form the backbone of your glass pool fence. Installing them at shallow depths—less than 24 inches in most soil types—risks tilting or collapse under pressure. For sandy or loose soil, aim for 30-inch depths with concrete footings. A laser level ensures posts stay plumb (perfectly vertical) during curing. Misaligned posts by just 1/8 inch per panel can create visible gaps or stress fractures over time. Always double-check measurements before pouring concrete. The stability of your posts is crucial, especially when considering the overall depth of a semi inground pool. Choosing the right pool depth ensures both safety and durability in your installation.
Overlooking Sealant and Edge Protection
High-quality silicone sealant prevents water infiltration between posts and panels, which can erode foundations or fog tempered glass edges. Apply UV-resistant marine-grade sealant in continuous beads, avoiding gaps. Edge protection films or silicone strips on glass panel corners minimize injury risks and meet ASTM F2286 safety standards for pool barriers. Skipping this step leaves sharp edges exposed and may void warranties from glass suppliers like C.R. Laurence or Oasis. Proper installation and maintenance are essential for pool safety and durability. When considering a pool remodel, it’s also important to assess the costs associated with retiling the pool to ensure it fits within your budget.
Rushing Through Safety Inspections
After installing glass pool fencing yourself, test every component. Measure gaps between panels and decking—they must not exceed 4 inches to prevent child access. Confirm the fence height reaches at least 48 inches above grade. Check gate hinges for smooth self-closing action (closing within 10 seconds from a 12-inch open position). Local inspectors often flag missing anti-latch mechanisms or non-tempered glass panels, which can add $200-$500 in rework costs. Maintaining your pool also includes looking at other important aspects, like Replacing a pool liner. Replacing a pool liner can significantly affect your overall maintenance budget.
With these pitfalls addressed, you’re closer to a secure, code-compliant pool area. Next, let’s tackle frequent questions about self-installing glass pool fencing to refine your plan. As the pool season approaches, ensuring safety measures are in place becomes essential. Preparing for your pool opening can bring excitement and fun for everyone involved.
FAQs About Self-installing Glass Pool Fencing
How Do I Handle Uneven Terrain During Installation?
For sloped or uneven surfaces, use adjustable base shoes or stepped glass panels designed to follow ground contours. Ensure posts remain vertically aligned with laser levels, and fill gaps under panels with UV-stable silicone or graded gravel to maintain code-compliant spacing (max 2″ above ground).
What Glass Type is Best for Coastal Areas?
Opt for laminated glass with a 316-grade stainless steel hardware system, which resists saltwater corrosion. The interlayer in laminated glass also provides added strength against high winds, while tempered glass meets safety standards but lacks the same corrosion resistance in hardware.
Can I Install Without Drilling Into Existing Concrete?
Yes, surface-mounted base channels bonded with epoxy adhesives (3,500 PSI rating) allow installation on intact concrete slabs. However, this method requires verified slab integrity and may not meet code in areas with frost heave risks without additional anchoring.
How Often Should I Inspect the Fence’s Stability?
Conduct formal stability checks every 6 months: test post rigidity by applying 25 lbs of lateral force, inspect hardware for rust, and verify gate self-closing mechanisms. After extreme weather events, perform immediate inspections for shifted panels or cracked sealant.
Are Non-concrete Footing Options Viable?
For temporary setups, helical ground anchors or wedge-type post supports work on stable soil, though they lack the permanence of concrete. These options typically require professional engineering approval to meet local safety codes for permanent pool barriers. When thinking about pool fun, consider how vibrant colors can make a difference. Painting pool noodles can add a splash of creativity to your pool experience.
Closing Thoughts
Installing your own glass pool fencing can be rewarding if you’re comfortable with precise measurements, structural work, and safety compliance. While DIY saves money—typically 30-50% compared to professional installation—it demands patience and attention to detail.
Before starting, verify local codes, invest in tempered glass (minimum 10mm thickness), and use stainless steel hardware (Grade 316 for coastal areas). A laser level and diamond-tipped drill bits are non-negotiable for accuracy.
For precise cost estimates tailored to your pool size and materials, try My Pool Calculator. Our tools help break down expenses for panels, posts, and concrete footings—so you can budget confidently.
Whether you DIY or hire a pro, prioritize safety. Double-check post depth (at least 24″ for stability) and panel alignment. A well-installed glass fence lasts 15+ years with proper care—just wipe down panels monthly with vinegar solution to prevent water spots.
Additional Resources for You:
- National Swimming Pool Foundation (NSPF). (2022). Pool & Spa Operator Handbook (4th ed.). Colorado Springs, CO: NSPF.
- Pros & Cons of Glass Fence Installation Around Swimming Pools
- How To Install a Pool Fence in Grass – All-Safe Pool Fence